Suppose you developed a web application and you want to install this application in a test environment.
To make the test more meaningful, you would like to install an SSL certificate with the application and use a domain name other than the standard ones, such as .com or .org. Consequently, the SSL certificate cannot be purchased because otherwise you would be limited to the standard domains mentioned above. You could use a self signed certificate, but you would get the annoying message from the browser that the certificate is not secure.
So how can you fix the problem? Follow me and you will see…
What we are going to do
In this post we’re going to see how to create an SSL certificate for an arbitrary domain and the relative CA certificate (Certification Authority) necessary to validate the certificate. In this example we are going to create a wildcard SSL certificate for the domain thedummyprogrammer.local (*.thedummyprogrammer.local).
To create our new SSL certificate, we will use OpenSSL (https://www.openssl.org/) which is usually installed by default in many Linux distributions. You can use OpenSSL on windows too, but I personally prefer to use the Linux version. Specifically, the OpenSSL commands that we will see shortly have been tested on an Ubuntu Desktop 20.04.3 LTS running on a virtual machine on my Windows PC.
Let’s start…
The birth of the certificate *.thedummyprogrammer.local
Now it’s the time… we are going to see step by step what you need to do to create an SSL certificate with his own CA certificate. Note that in all of the listed steps, you can replace “thedummyprogrammer.local” with a domain of your choice.
Run your Linux preferred distribution, open a terminal and follow the steps below.
Step 1: create the private key for the CA certificate
In this step you will be asked for a password. Type the password and take a note of it.
openssl genrsa -des3 -out thedummyprogrammer.local.ca.keyStep 2: create the CA certificate
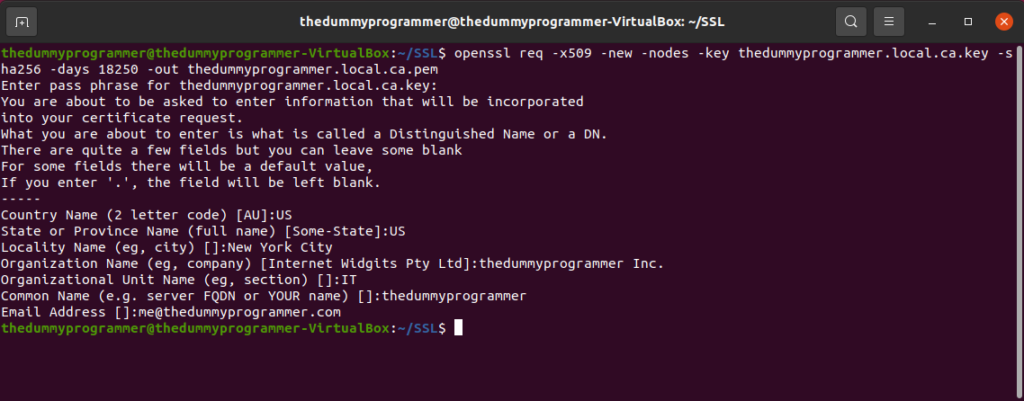
In this step you will use the key created in step 1. Note the parameter -days 18250: this means that this CA certificate will last 18250 days or 50 years. Normally you would never use such a long expiration date for a certificate, but since it’s a certificate created for testing purposes that’s fine.
openssl req -x509 -new -nodes -key thedummyprogrammer.local.ca.key -sha256 -days 18250 -out thedummyprogrammer.local.ca.pemWhen you press Enter, you will be asked:
- The password for the private key you created in step 1
- Some question about the certificate. In the following screenshot you can see my answers, basically invented from scratch; you have to insert your own answers

Step 3: create the configuration file for the CSR
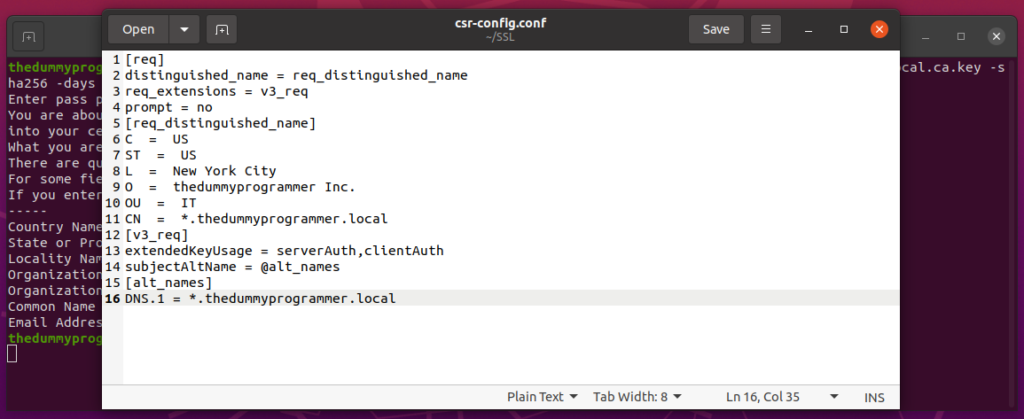
In this step you need to create a text file to create a CSR (Certificate Signing Request). We will call this file “csr-config.conf”, but you can name it as you want. Since I’m using Ubuntu Desktop, I can use GEdit to create the file. So if you have a Linux installation with a graphical interface and you can use GEdit, execute this in your command line:
gedit csr-config.confand past this content in your newly created file:
[req]
distinguished_name = req_distinguished_name
req_extensions = v3_req
prompt = no
[req_distinguished_name]
C  =  US
ST  =  US
L  =  New York City
O  =  thedummyprogrammer Inc.
OU  =  IT
CN  =  *.thedummyprogrammer.local
[v3_req]
extendedKeyUsage = serverAuth,clientAuth
subjectAltName = @alt_names
[alt_names]
DNS.1 = *.thedummyprogrammer.local
This is a screenshot of my file:

Step 4: create the private key for the SSL Certificate
openssl genrsa -des3 -out wildcard.thedummyprogrammer.local.keyAgain you will be asked for a password, and again take note of your password and don’t forget it.
Step 5: create the CSR
To create the CSR, execute the following in your terminal:
openssl req -new -newkey rsa:2048 -key wildcard.thedummyprogrammer.local.key -nodes -out wildcard.thedummyprogrammer.local.csr -extensions v3_req -config csr-config.confStep 6: create the configuration file for SSL certificate signing
In the same way as step 3, create an empty file and name it “signing-config.conf”. Fill the file with this content:
authorityKeyIdentifier=keyid,issuer
basicConstraints=CA:FALSE
[req_ext]
keyUsage = digitalSignature, nonRepudiation, keyEncipherment, dataEncipherment
extendedKeyUsage = serverAuth, clientAuth
subjectAltName = @alt_names

[alt_names]
DNS.1 = *.thedummyprogrammer.local
Step 7: create the SSL certificate in CRT format
We are ready to create the SSL certificate. Just execute the following in your command line:
openssl x509 -req -in wildcard.thedummyprogrammer.local.csr -CA thedummyprogrammer.local.ca.pem -CAkey thedummyprogrammer.local.ca.key -CAcreateserial -out wildcard.thedummyprogrammer.local.crt -days 18250 -sha256 -extfile signing-config.conf -extensions req_extSometimes you may need to remove the password from the private key. If this is the case, the following command is for you:
openssl rsa -in wildcard.thedummyprogrammer.local.key -out wildcard.thedummyprogrammer_nopass.local.keyYou will be asked for the password you chose earlier.
Step 8: create the certificate in PFX format
This is the last step. To create the certificate in PFX format execute the following command:
openssl pkcs12 -export -out wildcard.thedummyprogrammer.local.pfx -inkey wildcard.thedummyprogrammer.local.key -in wildcard.thedummyprogrammer.local.crtAt this point you created at least the following files:
- thedummyprogrammer.local.ca.key
- thedummyprogrammer.local.ca.pem
- wildcard.thedummyprogrammer.local.key
- wildcard.thedummyprogrammer_nopass.local.key
- wildcard.thedummyprogrammer.local.crt
- wildcard.thedumyprogrammer.local.pfx
We are now ready to use them in a practical example. You may be wondering why keep the same certificate in different formats. From what I’ve seen, in some environments it’s easier to use one format rather than another, that’s why it’s convenient to have multiple formats.
I suggest you to save those files in a safe place, along with the passwords to use with the private keys.
We will see in the next post how to use those certificates in a practical example.