In the previous post we created a basic setup where we installed Visual Studio Code (from now VS Code), npm, and the TypeScript compiler. Now we will see how we can create a simple web page, with the goal of creating the page’s JavaScript code using TypeScript.
Let’s start by creating an empty folder in your PC, in which we will put all the files of our project.
In my case, I created the following new folder: C:\MyTests\AnotherTSApp.
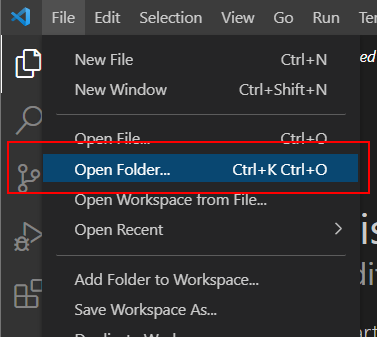
Now load VS Code and open the folder you just created with the “Open folder…” menu command:
After that, you will receive the following warning:
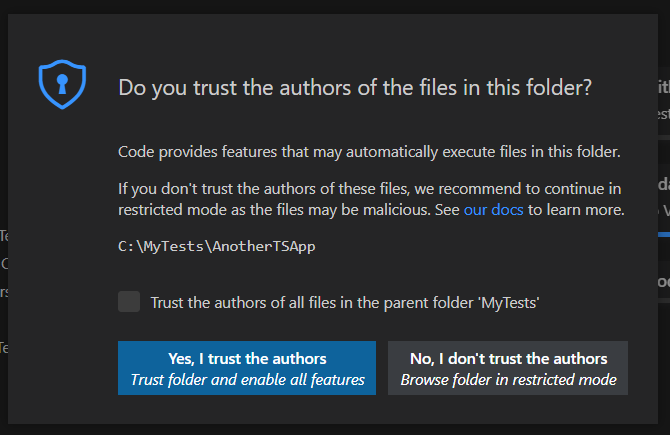
Click the button “Yes, I trust the authors” (unless you don’t trust yourself!!).
Install Five Server Extension
We are going to create a simple web page, so it will be useful if you could run our web page in a development web server. In order to do this, let’s install VS Code’s extension “Five Server”, which is basically a local web server.
To add an extension to your VS Code installation click on the “Extension” button on the left sidebar of the window and then search for the extension we want to install, as shown in the next screenshot:
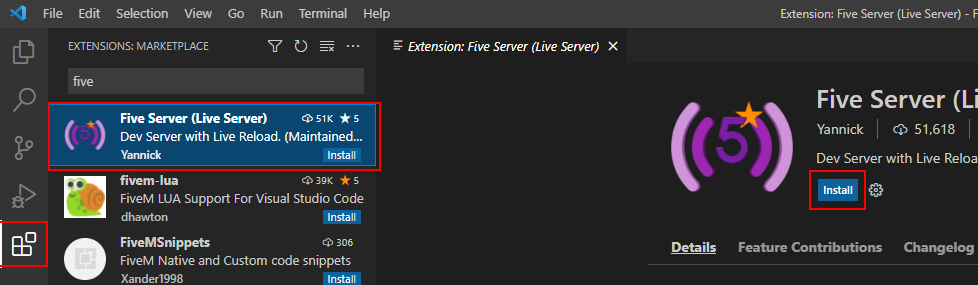
Click “Install” to proceed with the installation.
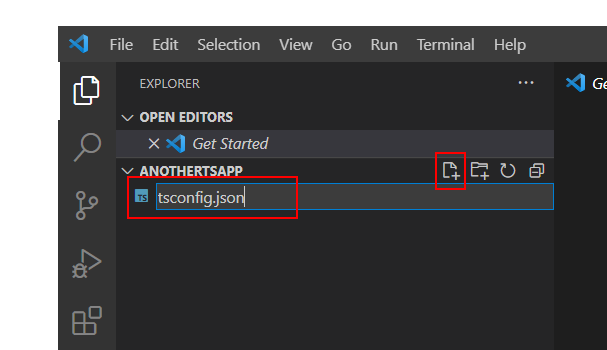
Create project files
Let’s start by creating a tsconfig.json file, which will contains our TypeScript compiler configuration. So add a new file using the command “New file” of VS Code:
In this new file, add the following lines:
{
  "compilerOptions": {
    "target": "es5",
    "module": "commonjs",
    "sourceMap": true
  }
}
This is a basic configuration of the TypeScript compiler. To find out more, I recommend consulting the TypeScript documentation, which you can find on the official site.
In this test project we will create an HTML page that will show the current date / time updated every second, using some JavaScript code created through TypeScript.
Add a new web page called “index.htm” with the following content:
<html>
    <head>
        <title>Another TypeScript application</title>
    </head>
    <body>
        <h1>This is the current date/time:</h1>
        <span id="CurrentDateTime"></span>
        <script src="clock.js"></script>
        <script src="app.js"></script>
    </body>
</html>
Next step, add the file “clock.ts” (*.ts is the extension of TypeScript source files). Here is the content:
namespace ClockLib {
    export class Clock {
        private _clockElement: HTMLSpanElement;
        constructor (el: HTMLSpanElement) {
            this._clockElement = el;
        }

        private onInterval(): void {
            let dt: Date = new Date();
            this._clockElement.innerText = dt.toUTCString();
        }

        public startClock(): void {
            setInterval(() => { this.onInterval(); }, 1000);
        }
    }
}
And the last file is called app.ts, which is the follow:
let clk: ClockLib.Clock = new ClockLib.Clock(<HTMLSpanElement>document.getElementById('CurrentDateTime'));
clk.startClock();
To build our test project we have to create a build task. To create a build task, under the menu “Terminal” click the item “Configure tasks…”, as you can see in the following screenshot:
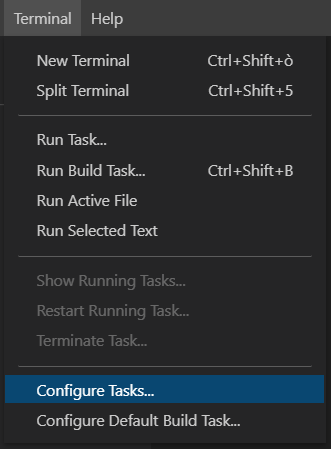
And then in the drop down click on the item “tsc: build – tsconfig.json”.
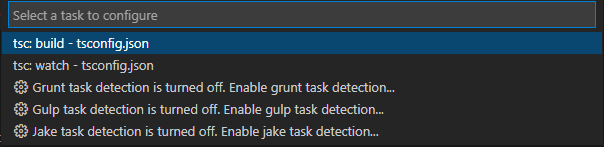
VS Code will automatically create a file named “tasks.json”, containing the new build task which you can make the default build task by clicking on the menu “Terminal” -> “Configure Default Build Task…”. In this way you can execute a build just pressing the key combination Ctrl + Shift + B.

If you run the build, you will see that the compiler has generated a .js file and a .js.map file for each .ts file you created. Both files are generated from the .ts file: the .js file is the JavaScript source code and the .js.map file is required if you want to debug the application.
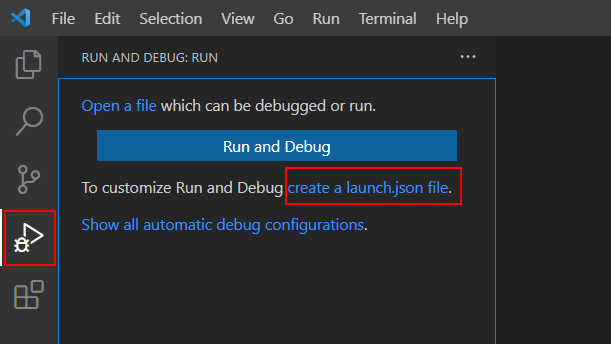
Running the application
It’s time to run the application! On the left side of VS Code, click on the tab “Run and debug”, and next on the link “create a launch.json file”.
You will see the following dropdown:
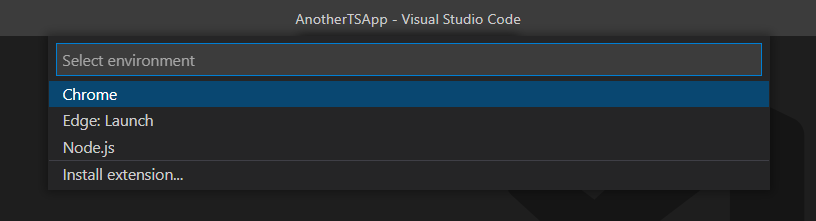
Since Edge is the default browser on my PC, I selected “Edge: Launch”. VS Code will create a new file called “launch.json”, which looks like the following:
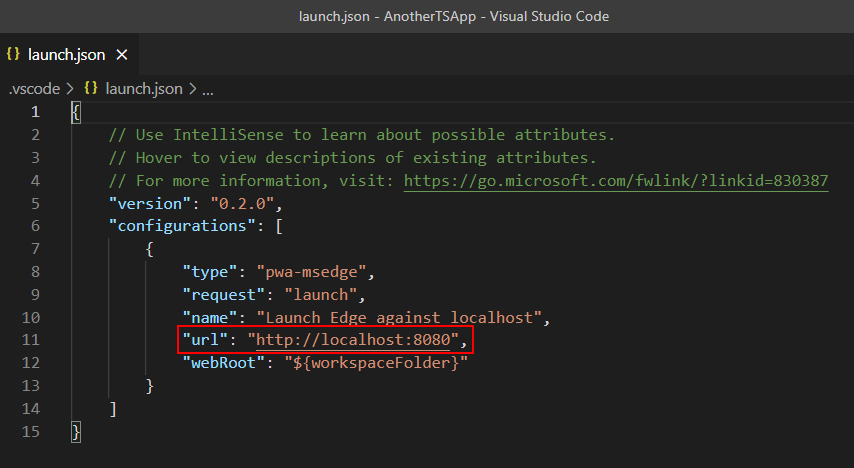
Change the “url” attribute in this way:
- modify url port from 8080 to 5555, which is the default port of Five Server
- append to the url the string “index.htm” to open the page we created above
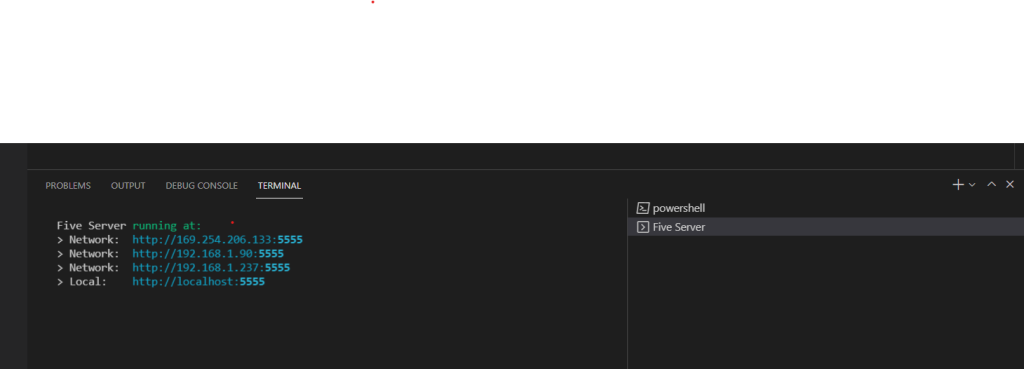
Finally, we can run our application. Start Five Server by clicking the button “Go Live” at the bottom right of VS Code window. An Edge instance may load after you click. If this happens, I usually close such window. In VS Code, in the Terminal window you should have evidence that Five Server is running.
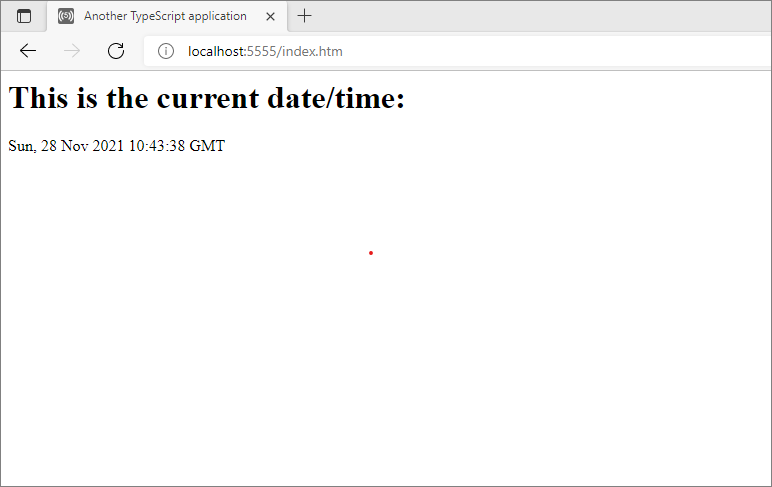
Now press F5 and you will see the browser load and display the page “index.htm” we have developed, with the clock updated every second.
A small step back…
A smal step back, just to highlight some points in our TypeScript source code… First of all, as you may have already noticed, TypeScript allows you to work in a strongly typed manner. Look for example at this declaration in the file clock.ts:
let dt: Date = new Date(); The declaration above means that we are creating a local variable named “dt” of type Date. If you try to assign an invalid value to that variable (for instance a string), the TypeScript compiler will generate a compilation error.
Another interesting point is the possibility of defining classes as it happens in “normal” object-oriented programming language like C#. To define the class “Clock”, we used the “class” keyword, which wasn’t available in JavaScript until EcmaScript 6. In the file “tsconfig.json” we specified as target “es5” (EcmaScript 5), which doesn’t contemplate the class “keyword”, but we don’t care because the TypeScript compiler will generate the appropriate code for us.
Last, but not least, with TypeScript we can easily create and use namespaces. You can enclose your code in a namespace by using the following syntax:
namespace ClockLib {
     ... your code ...
}
Remember that if you want to share a class that reside in a namespace with other pieces of code, you have to mark the class with the keyword “export” and use the full namespace and class path, for example “ClockLib.Clock”. In old JavaScript you had to write some strange code to get the same result…
There is a lot more to be said about VS Code and TypeScript. But for now I think we can stop here…
See you in the next post!